
This article is a part of Windows Server 2016 Tutorials series. Within the previous Article, we Discuss What is DHCP and How DHCP Works. Now we’ll move forward and see How to Install and Configure DHCP Server on Windows Server 2016.
As we all know the work of DHCP Server is to assign IP Addresses to the Client Computers in a Network. Now we will see how we can set up DHCP Server on our Windows Server 2016 Machine.
Installation and Configuration DHCP Server on Windows Server 2016
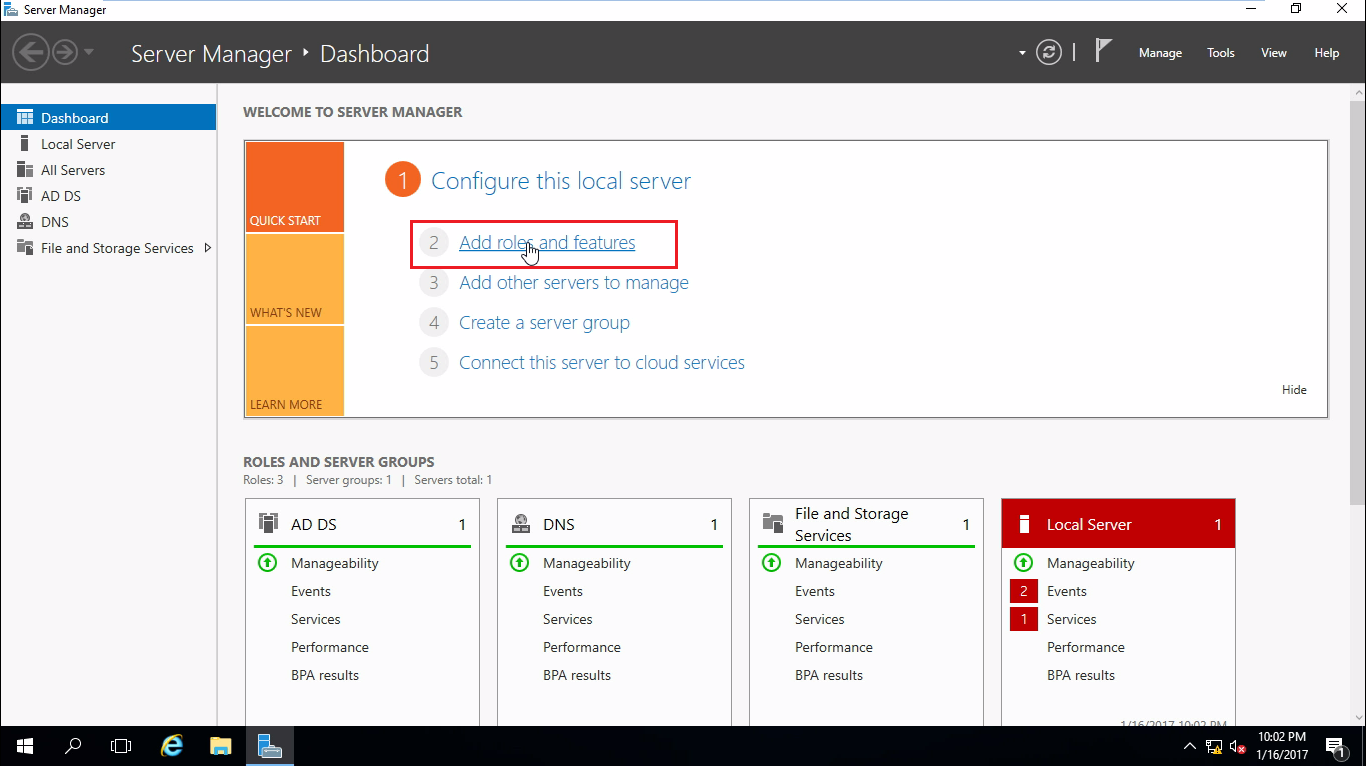
Step 1. Open your Server Machine and open the Server Manager console and go to Manage and then Click on Add Roles and Features, or You can Simply Click on Add Roles and Features from the Server Manager Console.
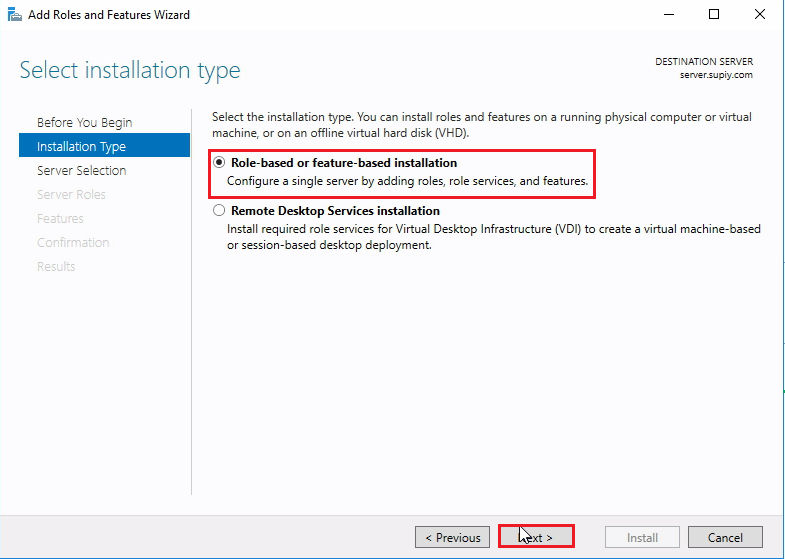
Step 2. Now in this Window, Select the Role-based or feature-based installation option and click on Next.
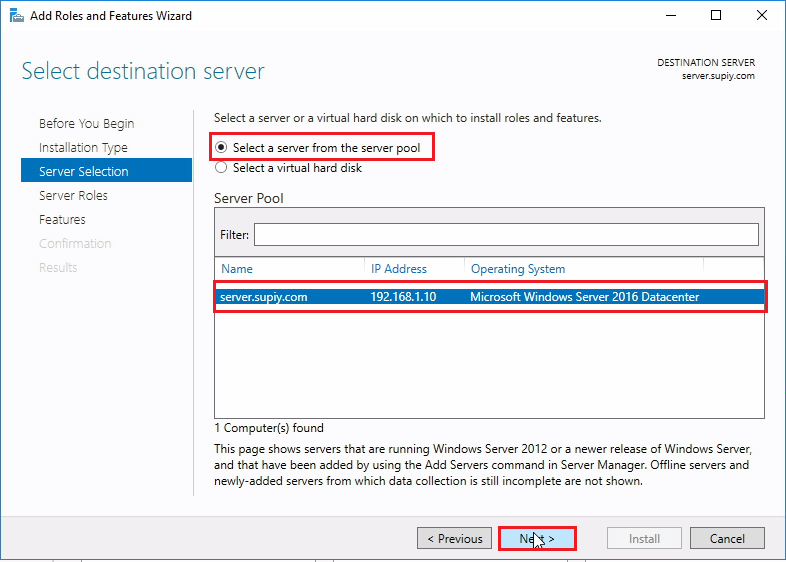
Step 3. Now we have to Select the Server, just Select the Server from the Server pool. and click on Next.
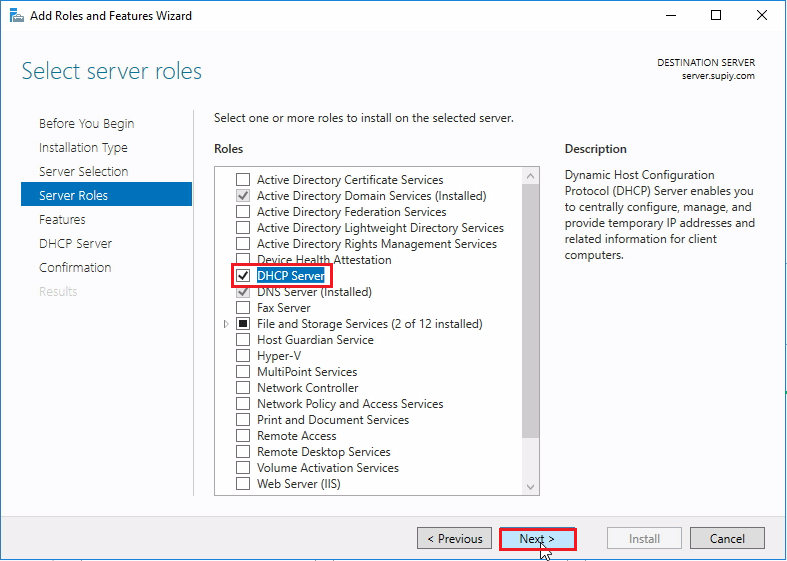
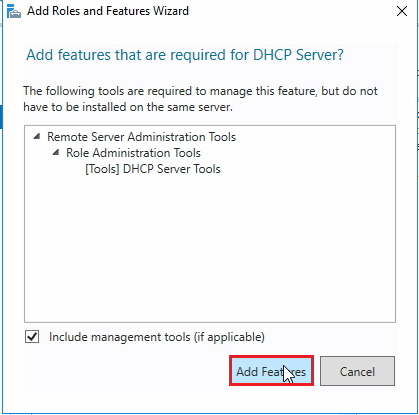
Step 4. From the list of Server Roles, Check the DHCP Server role > Click on Add Features on the popup window and simply Click on Next.
Step 5. Click on Next.
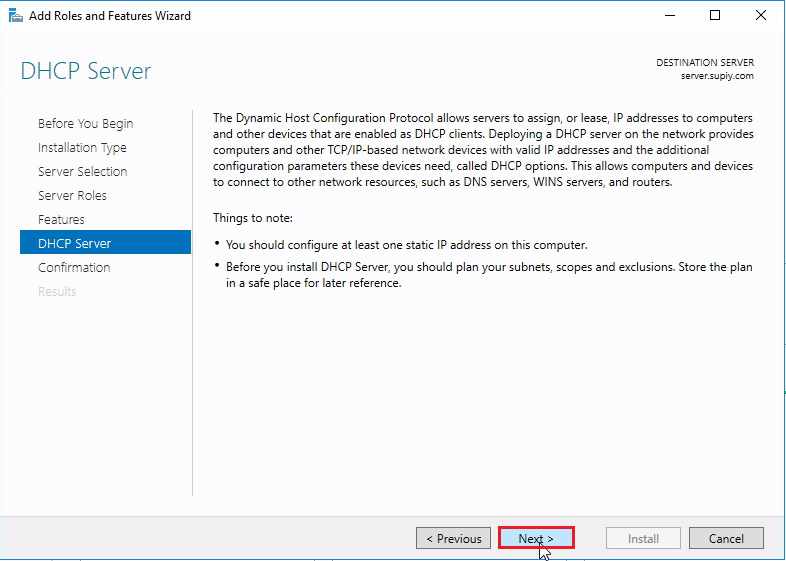
Step 6. In the Next window, it will show you the Description of the Role which you are installing. Click on Next.
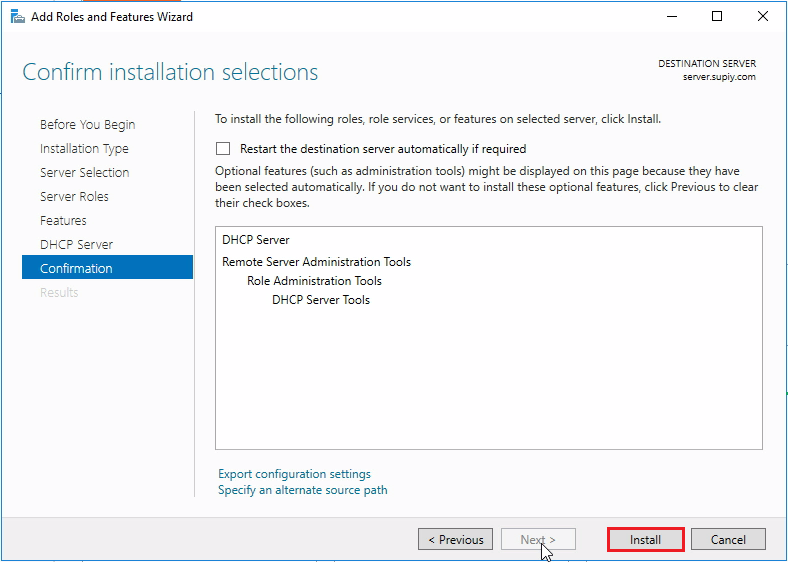
Step 7. Now you will see a window which confirms the Installation Selections. Click on Install.
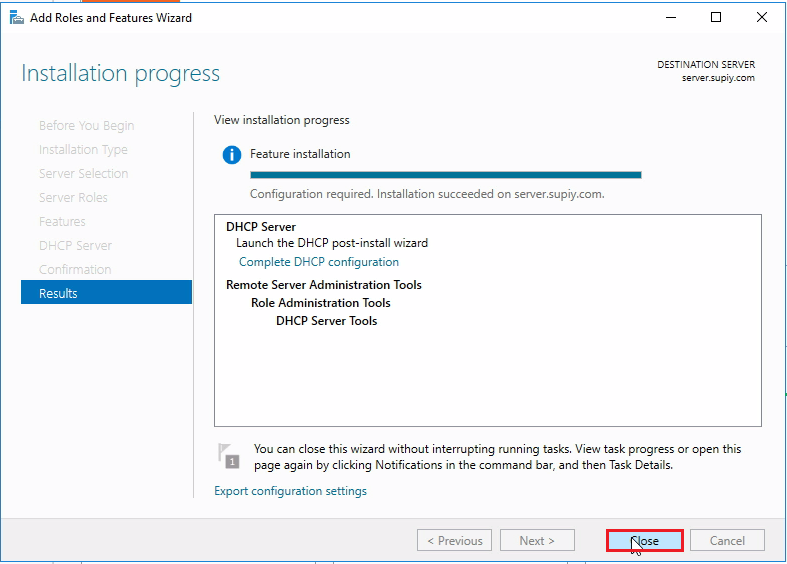
Step 8. Wait for the installation bar to complete, after that the Installation of DHCP role is completed on your Server. Click on Close.
Post Deployment Configuration
In this, we will see how to complete the post-deployment configuration for the DHCP.
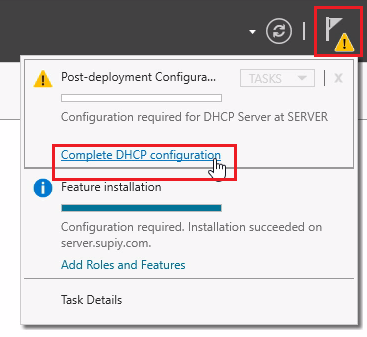
Step 1. On the Notification Panel, you can see a Notification, Click on the Notification Icon from the Top of the Dashboard. You can see a Notification Regarding Post Deployment Configuration of DHCP. Click on Complete DHCP Configuration.
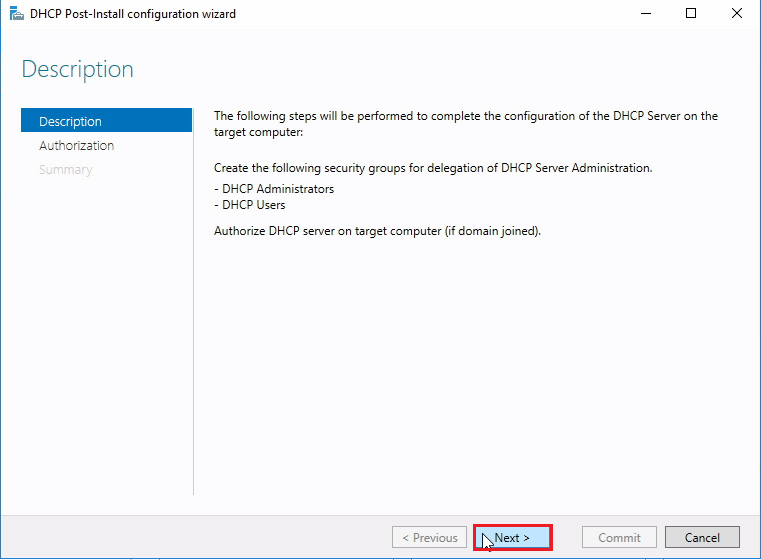
Step 2. Click on Next.
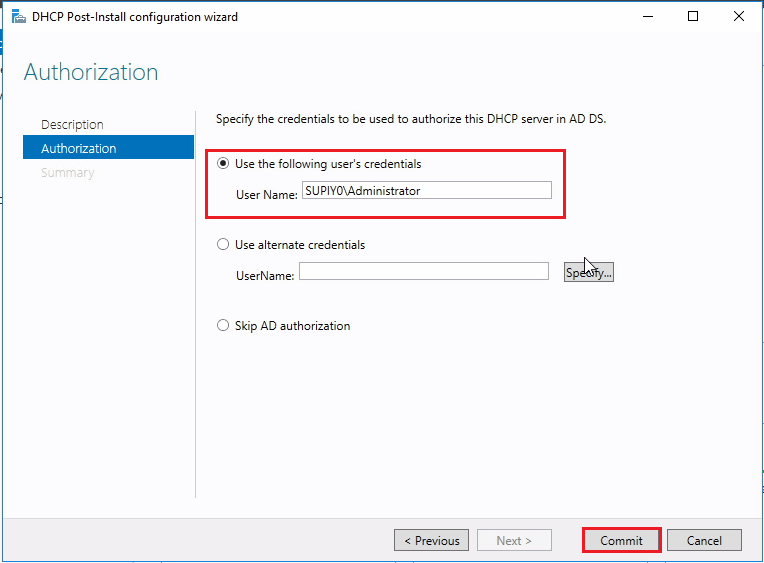
Step 3. Set the appropriate domain user account for the management of DHCP Server. Here I leave it by default because the administrator account has the right privilege to perform DHCP Server configuration.Click on Next.
Step 4. Next Window will show the summary.Click on Close.
Configure DHCP Server and Creating Scope
Now we will Configure the DHCP Server so that it can assign the IP address to the Client PCs.Follow the Steps below.
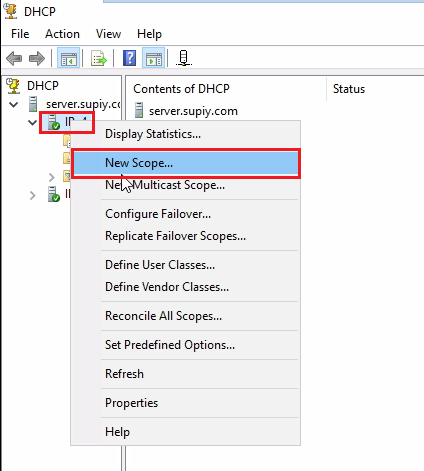
Step 1. Open your Windows Server and open Server Manager console > Tools > DHCP.
Step 2. Here we will create a scope.Right-click on IPv4 > and click on New Scope…
Step 3. New Scope Wizard will Open, Click on Next.
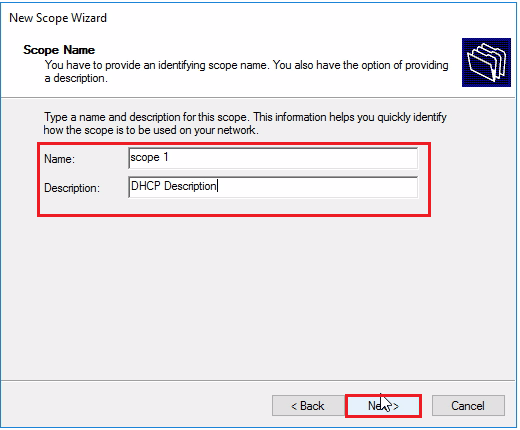
Step 4. Here Enter the Scope name and the Description in the Name and Description field.After entering click on Next.
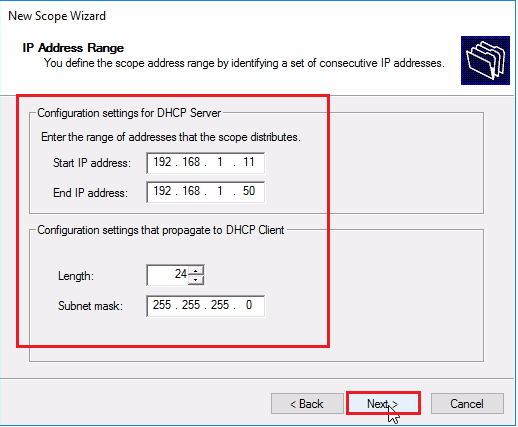
Step 5. We have to enter the IP address range which we want to assign to the client PCs.Enter the Start and End IP address, Length, and the Subnet mask.after entering click on Next.
Step 6. Here we have to enter the IP range which we want to exclude from the scope.If you don’t want to Exclude any IP then leave it Blank and Click on Next.

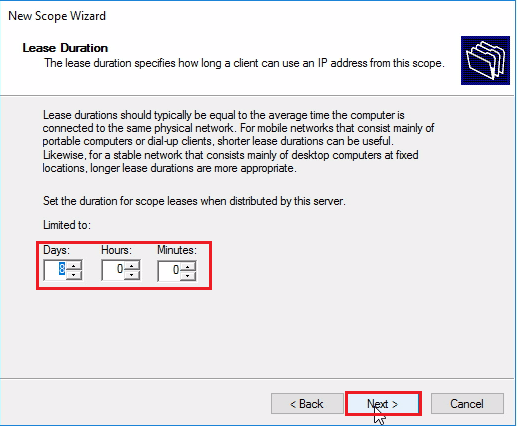
Step 7. Here choose the lease duration for the assigned IP Addresses or you can leave it as it is.then Click on Next.
Step 8. Now it asks for the configuration of DHCP options.select Yes, I want to configure these options now.and click on Next.

Step 9. Enter the Default gateway address (Normally its Routers IP Address), Click on Next.

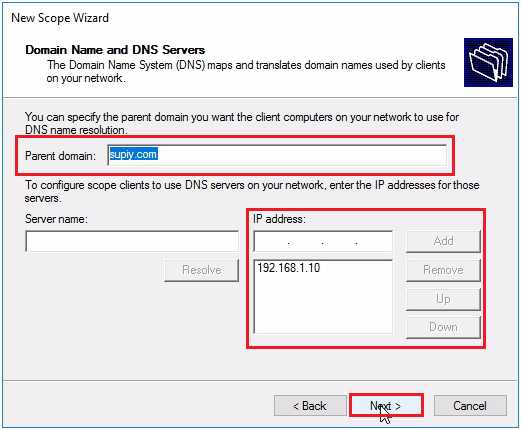
Step 10. Enter the Domain name and IP address.In a Domain Environment, you can enter the Parent Domain controller’s IP. Click on Next.
Step 11. Here enter the WINS Server Details. If there is no WINS Server Leve it Blank, and Click on Next.
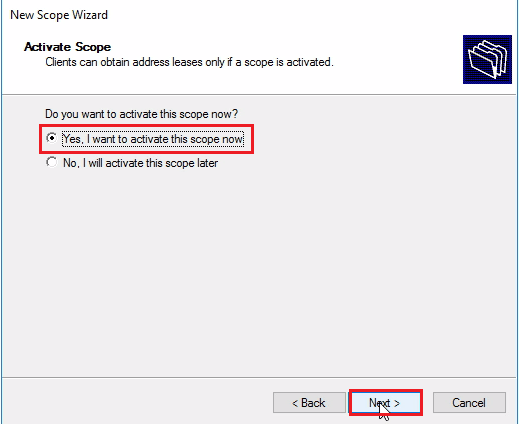
Step 12. Select Yes, I want to activate the scope now to active the scope immediately, and click on Next.
Step 13. We have reached the final step, now click on Finish.
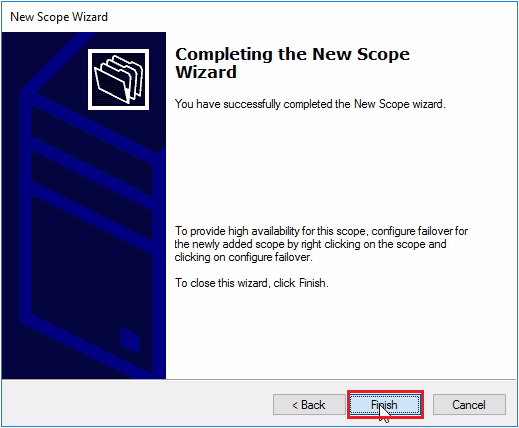
Congratulations! finally, we have Successfully Installed and Configured DHCP Server on our Windows Server 2016. In next Part, we will see What is Windows Deployment Services and how to Install WDS Role on Windows Server 2016.
Download “Tutorials for Windows server” Android application Now.
So above Steps is all about DHCP. Using these Steps you can Install and configure DHCP Server on your Windows Server 2016 Machine. Hope you all like this post, share it with others too and Leave a comment below if you need any suggestion at any steps.
housekeeping services in mumbai | housekeeping services in navi mumbai | facility management companies in mumbai | housekeeping agency in mumbai | housekeeping contractors in mumbai | housekeeping services in thane |