
In this series
This article is a part of Windows Server 2016 Tutorials series. Within the previous Article, we Learned What is Windows Deployment Services and Installation of WDS Role on Windows Server 2016. Now we’ll move forward and see how to Configure WDS on Windows Server 2016. Before these keep in mind that your system has put in with WDS Role.
Configuration of WDS on Windows Server 2016
Step 1. First, open Windows Deployment Console. To do so, Open your Windows Server and open Server Manager console > Tools > click on Windows Deployment Services.
Step 2. A New window of Windows Deployment Services will open.Right-click on the Computer name and Click on Configure Server.

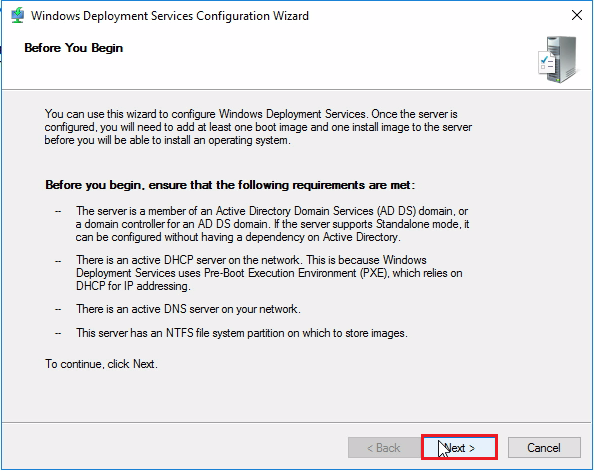
Step 3. A new window of WDS Configuration Wizard will open.This window will show all the pre-requisites that are required before the Configuration of WDS.Click on Next.
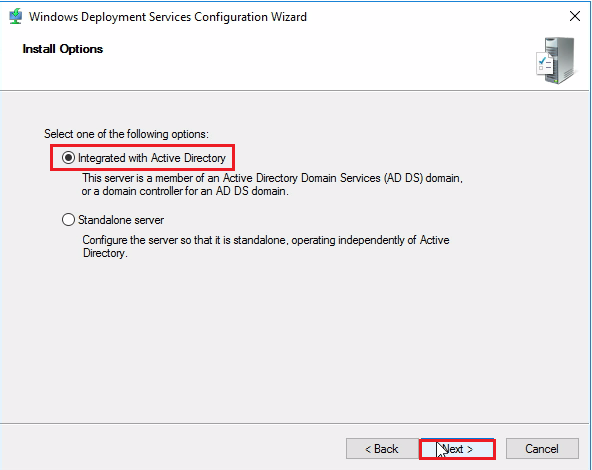
Step 4. From the Install Options Select Integrated with Active Directory.because our server is a member of a Domain.
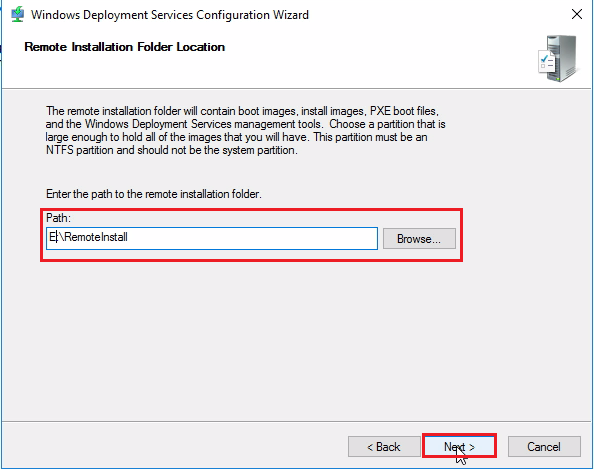
Step 5.Now we have to Select the Remote Installation Folder Location.Select the Folder Location (Make sure that the folder should not be the part of the system partition and it should be created on NTFS partition).This Folder Contains Boot Images, Install images, PXE boot Files, and the WDS Management Tools.
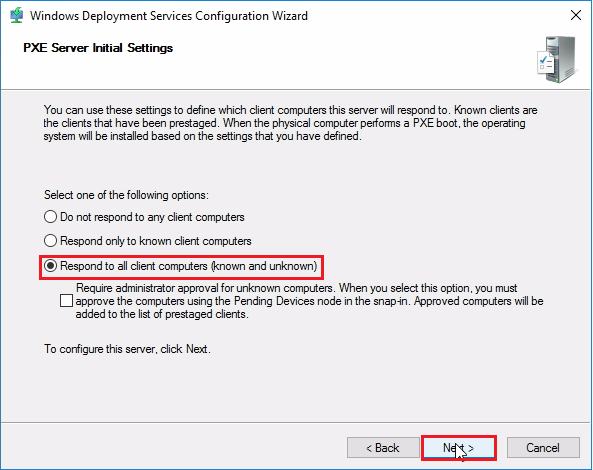
Step 6. Next Window is of PXE Server Initial Settings.Select Respond to all Client (known and unknown) .and click on Next.
Step 7. Wait for it to complete the Configuration.and click on Finish.
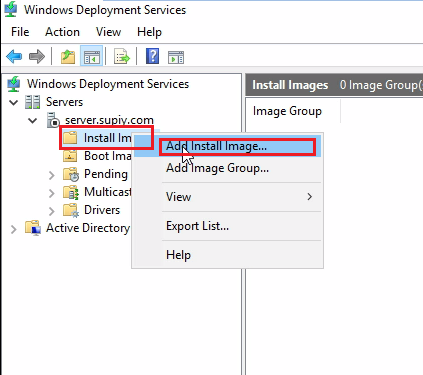
Step 8. In this step, we will add Install Image. Install images are the operating system images that you deploy to the client computer.To add the Install image, right-click on Install Images, click on Add Install Image.
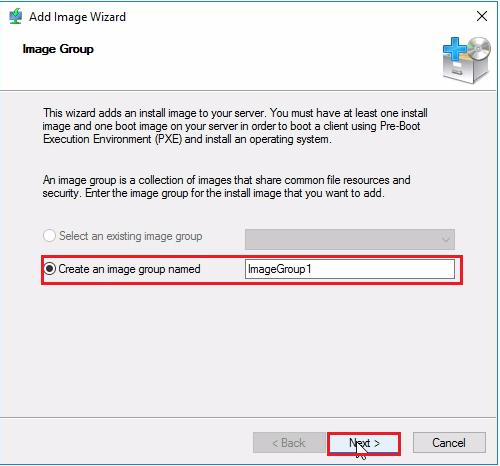
Step 9. Select Create an Image group named and enter a name and Click on Next.
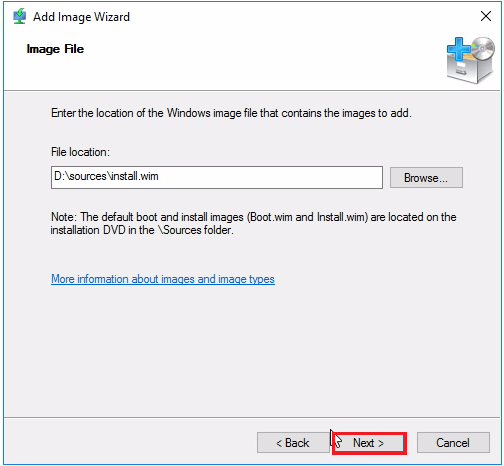
Step 10. On NextWindow,, Click on Browse and Select Install.wim file and click on Open. and Click on Next.

Step 11. In the Screenshot, you can see I have selected all the editions of Windows 10 that are listed. click on Next.

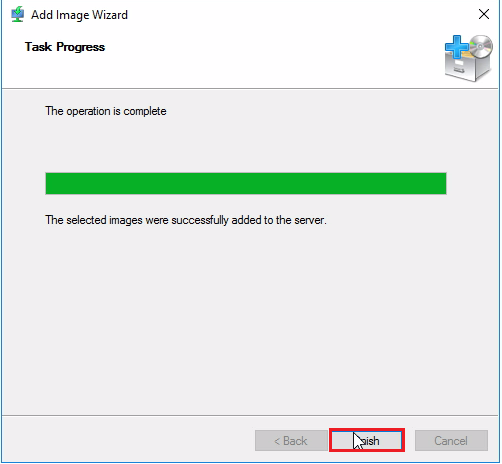
Step 12. Wait for it to Finish the Proces, after the process complete click on Finish.
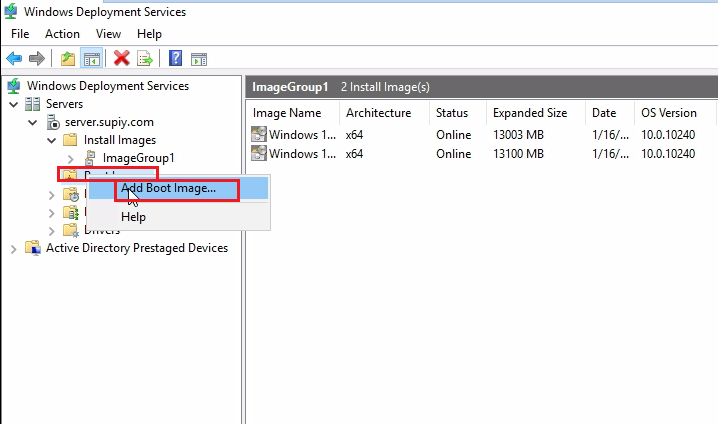
Step 13. Now we will add Boot image. Boot images are images that boot a client computer to perform an operating system installation. To add the Boot image, right-click on Boot Images and click on Add Boot Image.
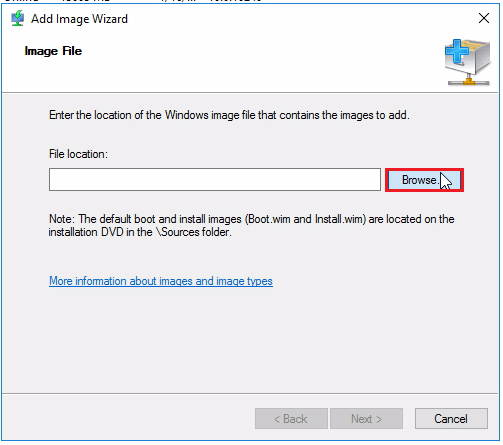
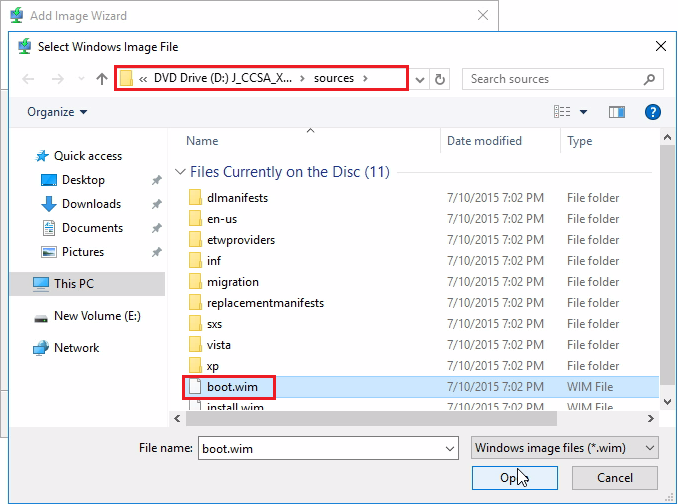
Step 14. Click on Browse and Select Boot.wim and click on Open and Click on Next.
Step 15. Click on Next, Next.
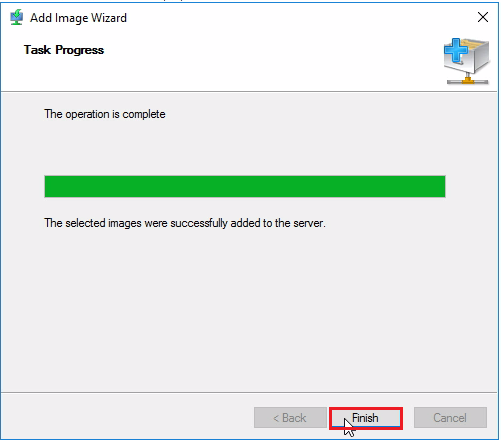
Step 16. Wait for it to finish the Process, after the process complete click on Finish.
Step 17. Now we will start the WDS Server.To do so, Click on Computer Name > All Task > click on Start.You will get a Prompt Message which says Successfully started Windows Deployment Services.


Congratulations! finally, we have Successfully Configured WDS on Windows Server 2016. In the next Part, we will see.
So above Steps are How you can Configure WDS Server so that client computers can Install Windows Remotely on the Network. Hope you all like this post, share it with others too, and leave a comment below if you need any suggestions at any steps.