
This article is a part of the Windows Server 2016 Tutorials series. In the previous article, we discussed how we can download the windows server ISO image from microsoft website and then create a bootable flash drive to Install Windows server 2016. Now we will move forward and see the Basic Configurations of Windows Server 2016.
Introduction
After Installing Windows Server 2016, you can start working on the server but before that, there are some configurations for the server to perform the work. These are the basic configuration to do before starting working with the server. The basic configuration like Setting the time zone, Renaming the Server, Setup the Network connection, and much more. So let’s get started with the below steps.
Some basic configurations for Windows Server 2016
1. Setting the time zone
The accurate Time zone is very important for the Server and Services to work on the Exact and Right timing. To set up a Time zone, Open “Server Manager”, click on “Local Server“, and click on “Time Zone”. After that click on “Change Time zone”, Nowhere select the correct time zone, and click on “OK“.
2. Rename the Server
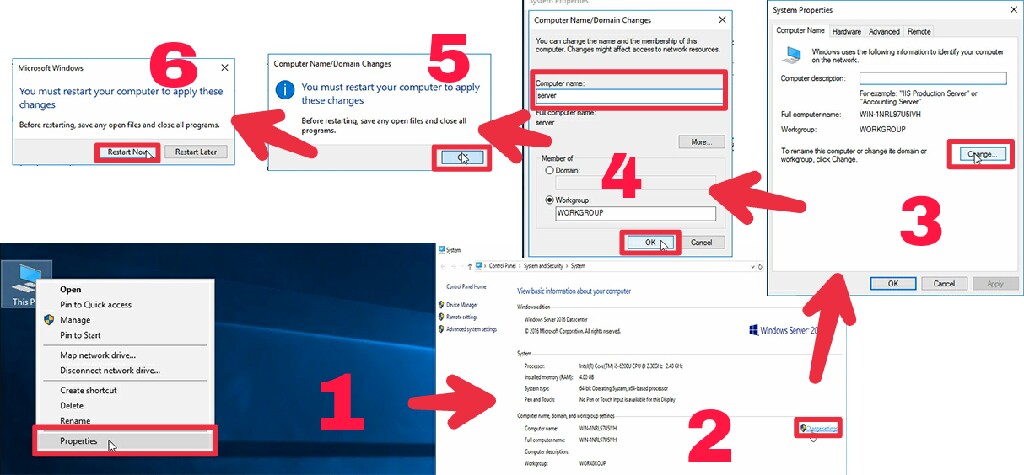
Renaming the Server is the most important part of the basic configuration. By default, the windows server is set up with a unique name. We have to change the name of the Server. To change it go to “Computer Properties“, click on “Change Settings“ and Click on “Change“. Here type the Computer name and click “OK“. After this, it will prompt for restarting the server, click on “Restart now“.
3. Turn on Automatic Updates in the Server
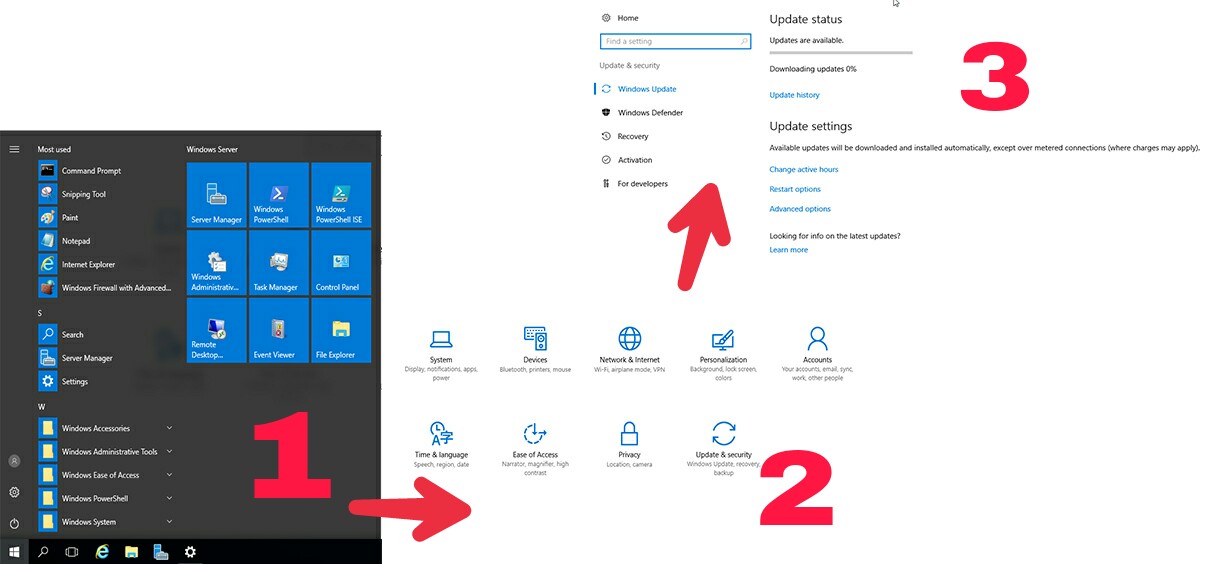
If we want to secure our Server then we have to keep the server updated with the latest updates. It is very important to protect our server. By turning on Automatic Updates on your server we will get the latest updates from Microsoft. To install the latest updates go to “Settings“ > “Update & Security“ and then click on “check for updates“ when there is an update download it and install it.
4. Setup Network Settings
If you are Setting up Windows Server 2016 in your network then it is recommended that you set the server with a static IP address. It’s very simple to set up a static IP address on the server.
Step 1. Go to”Settings“ > “Network & Internet“ > “Change adapter options“ .
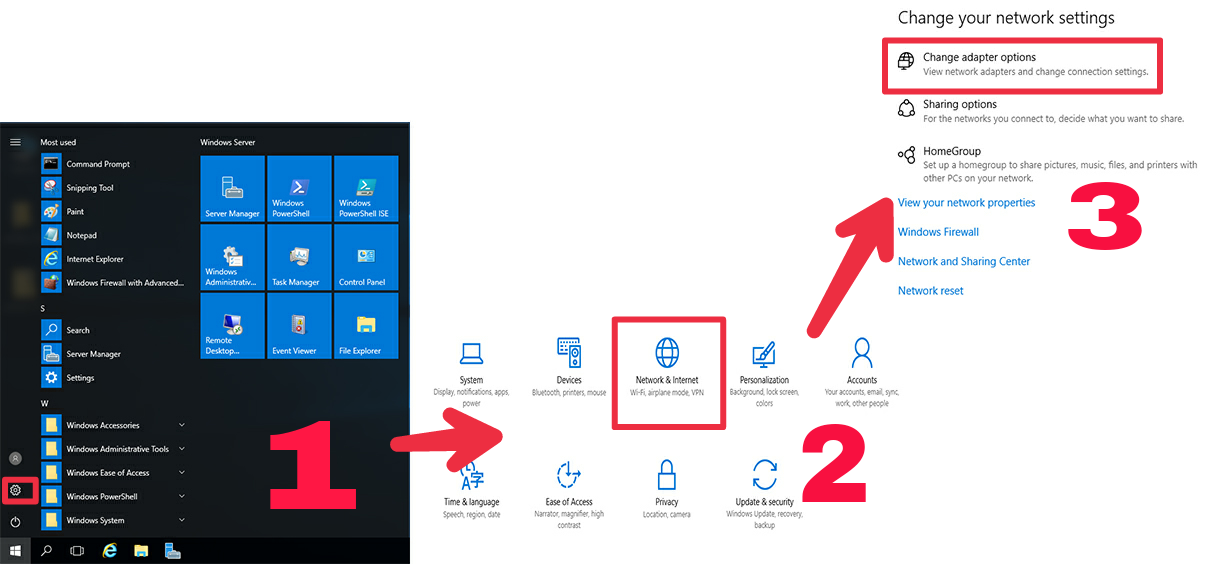
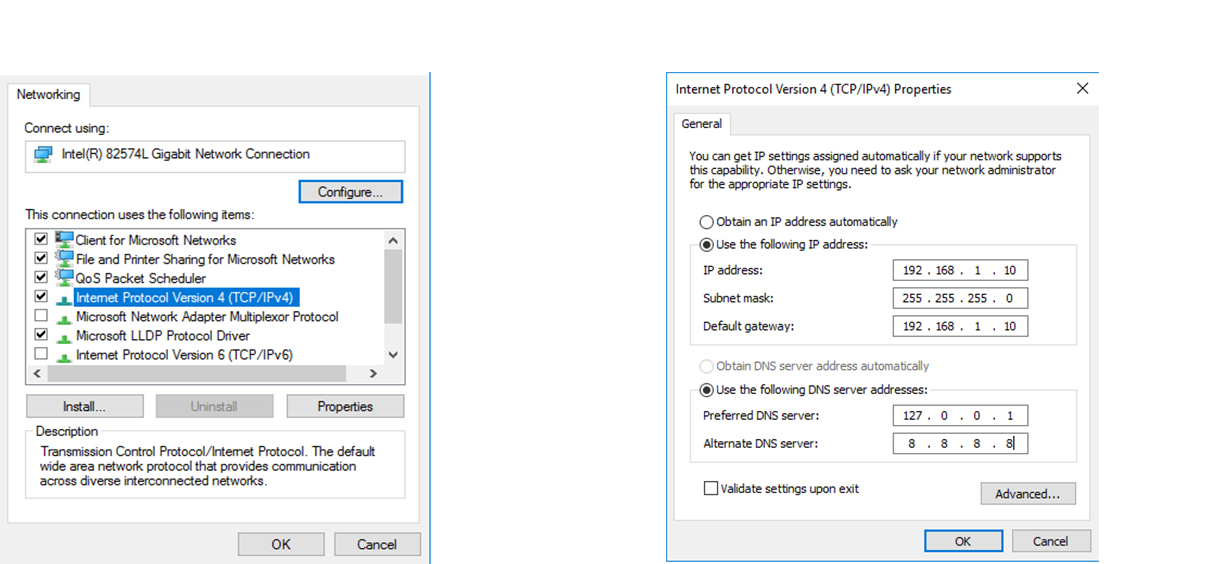
Step 2. On the Network Connections select your Network adapter to configure. Right-click on the network adapter and choose “Properties“.
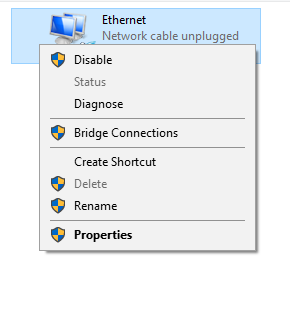
Step 3. Now Double click on “Internet Protocol Version 4 (TCP/IPV4)“. Now you have to enter the IP Address you want to assign to the server, Network Mask, Default Gateway, and the DNS IP Address.
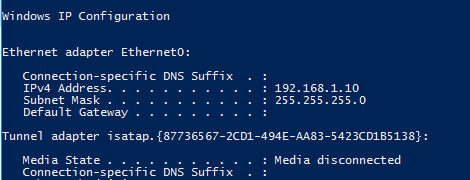
Step 4. Click OK. Done! we have successfully set a static IP address on our server. To see the IP Address open the command prompt or Powershell and type “ipconfig” . You will see the screen like this.
Congratulations! finally, we have Successfully Configured some Basic Configurations in Server. In the next Part, we will discuss Domain Name Service Server.
Download the “Tutorials for Windows server” Android application from the play store now so that you can have access to all the information related to Windows Server.
Conclusion
So this guide is all about the basic configurations for Windows Server 2016. With these steps, you can do the Basic Configuration for Windows Server 2016. Hope you like this cool trick, do share this trick with others too. Leave a comment below if you have any related queries about this.