
This article is a part of the Guide for Burp Suite series. Within the previous article, we learn about some of the features of the Intruder tab. Now we’ll move forward and see how to work with the Burp Intruder tab. So Let’s Get Started.
The Burp Intruder allows a tester to brute-force or fuzz specific portions of an HTTP message, using customized payloads. For all the Practical we will be using OWAS Juice Shop which is running on a docker.
Working with Burp Intruder
The following are the steps you can go through to use Burp Intruder.
1. Open the Firefox browser and enable the network proxy from the Foxyproxy extension.
2. In the Firefox browser, visit the login screen of the OWASP Juice Shop and try to log into the application. For example, type Email as “admin@juice-sh.op” and password as “test”.
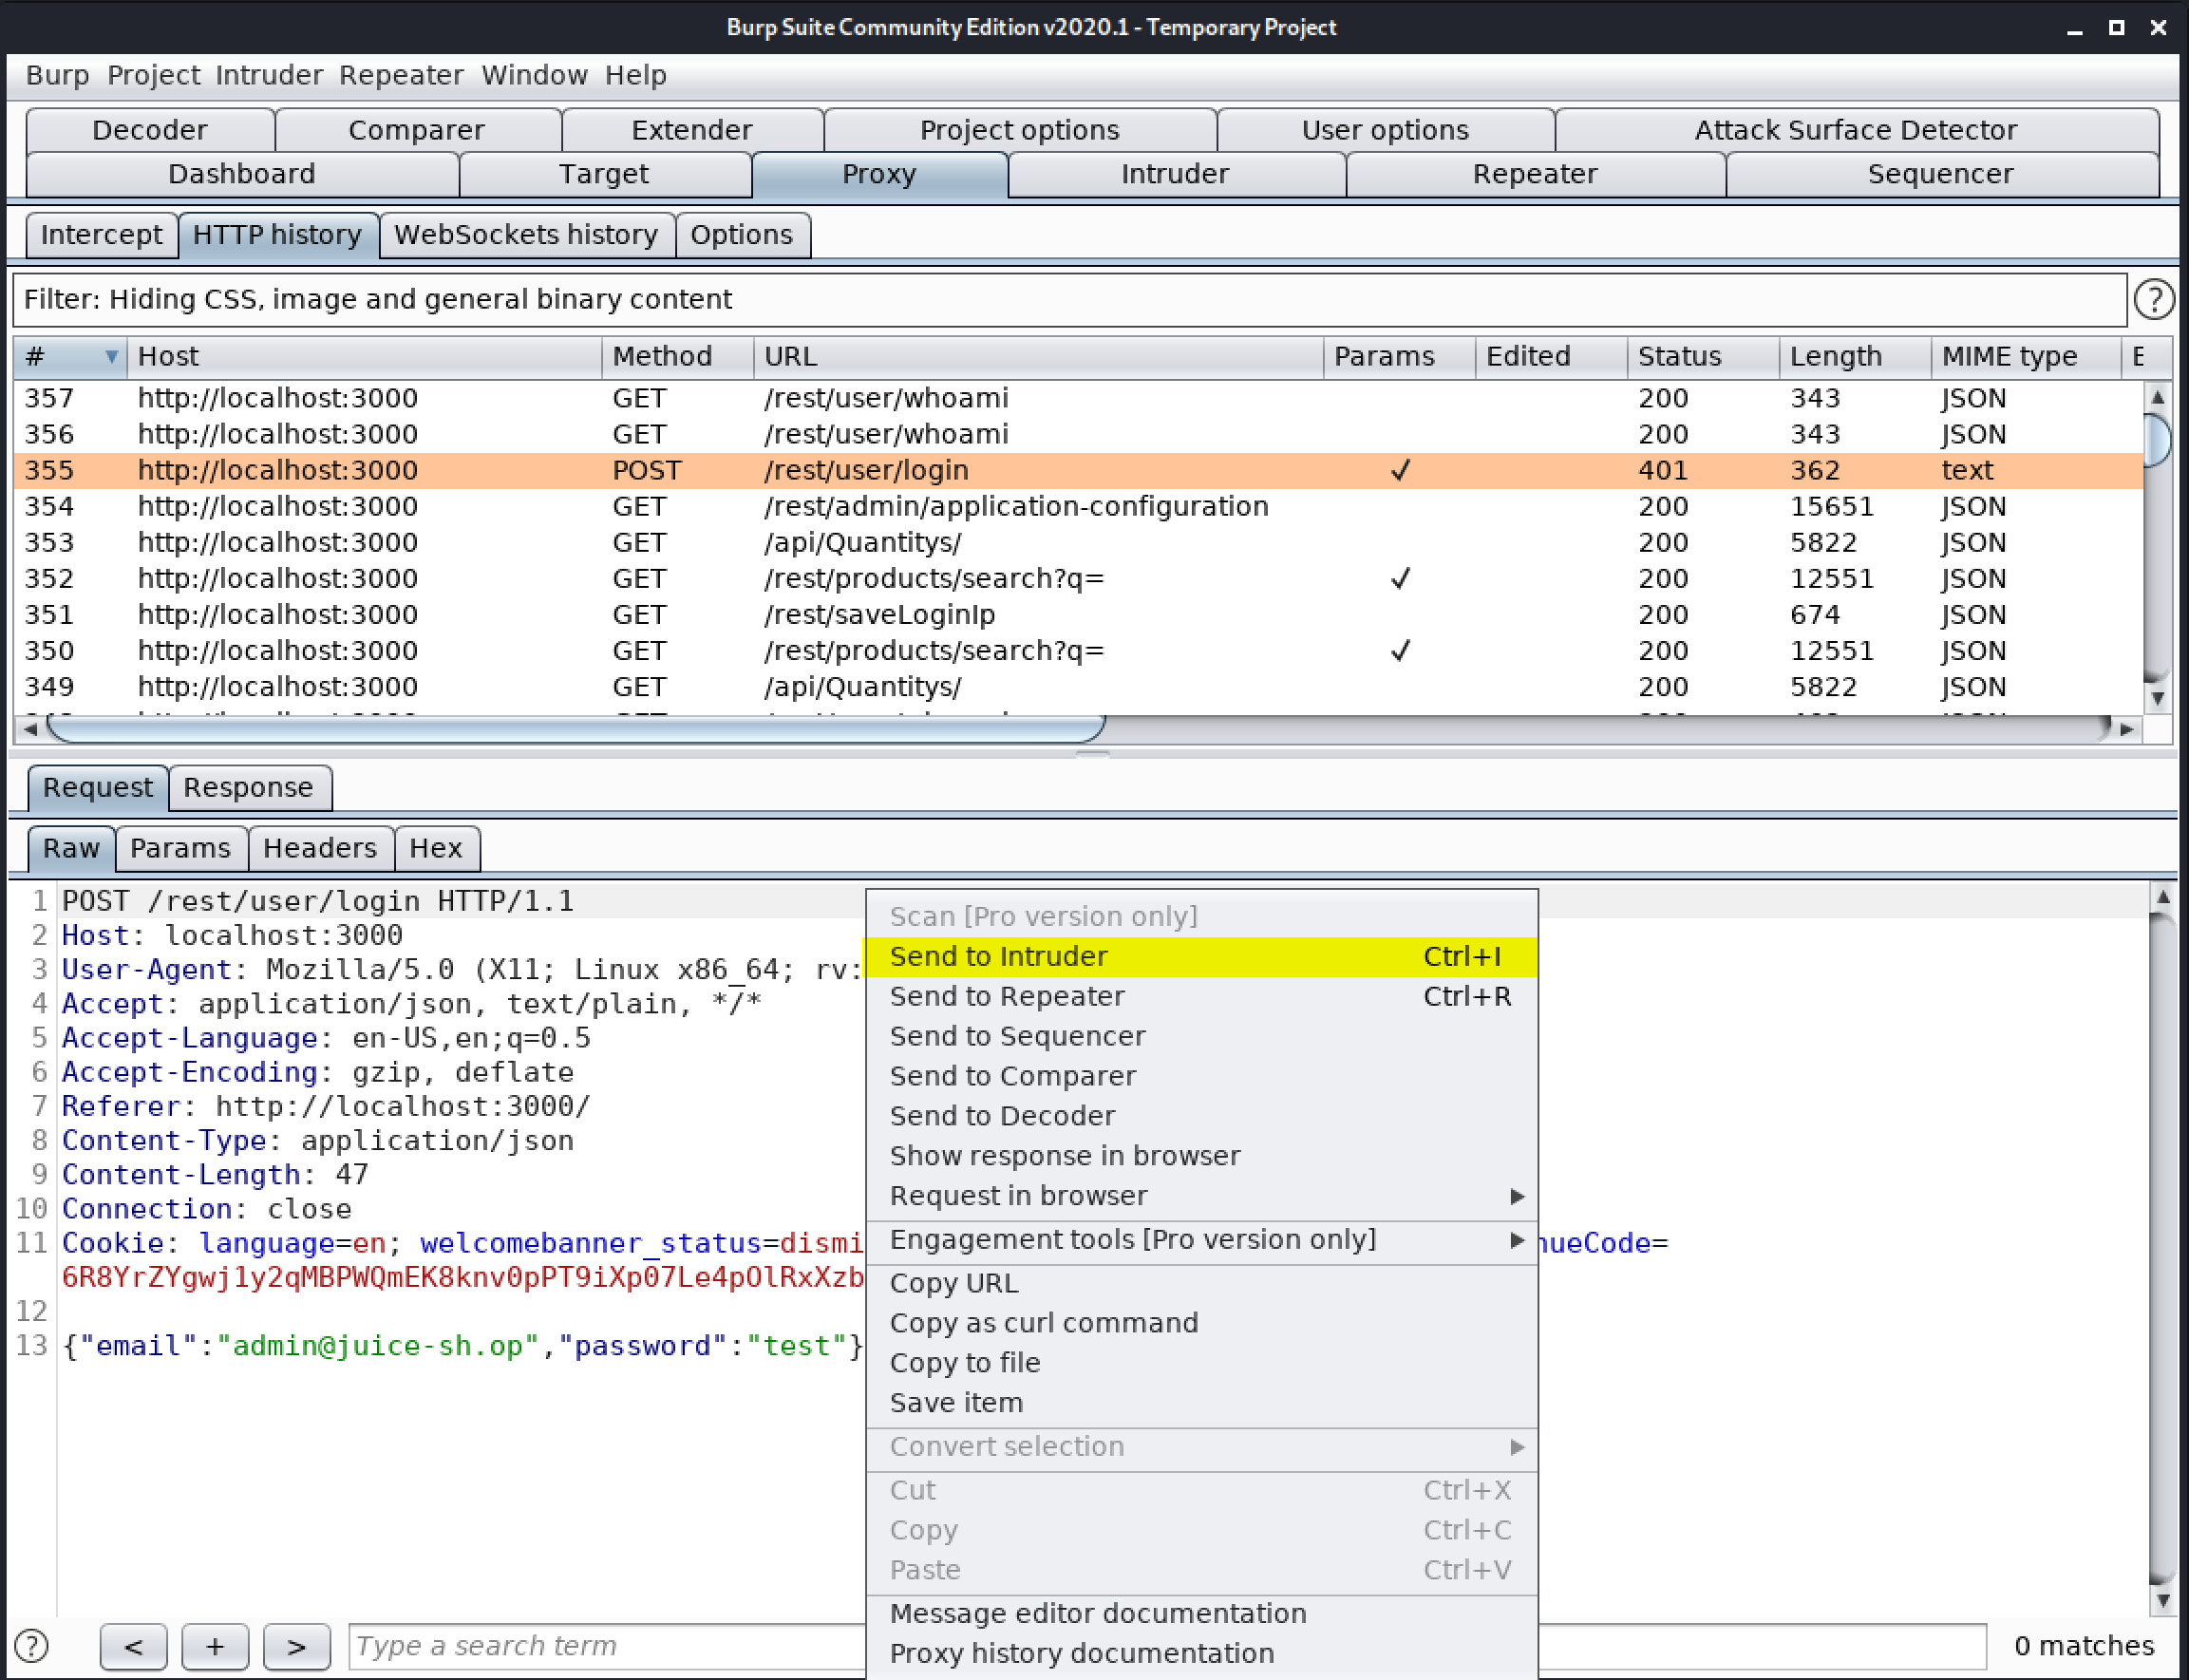
3. In burp, Go to the Proxy tab, and the HTTP History sub-tab and find the login attempt.
4. Select the login attempt request in the HTTP history, right-click the Request tab, and select “Send to Intruder” as shown below.
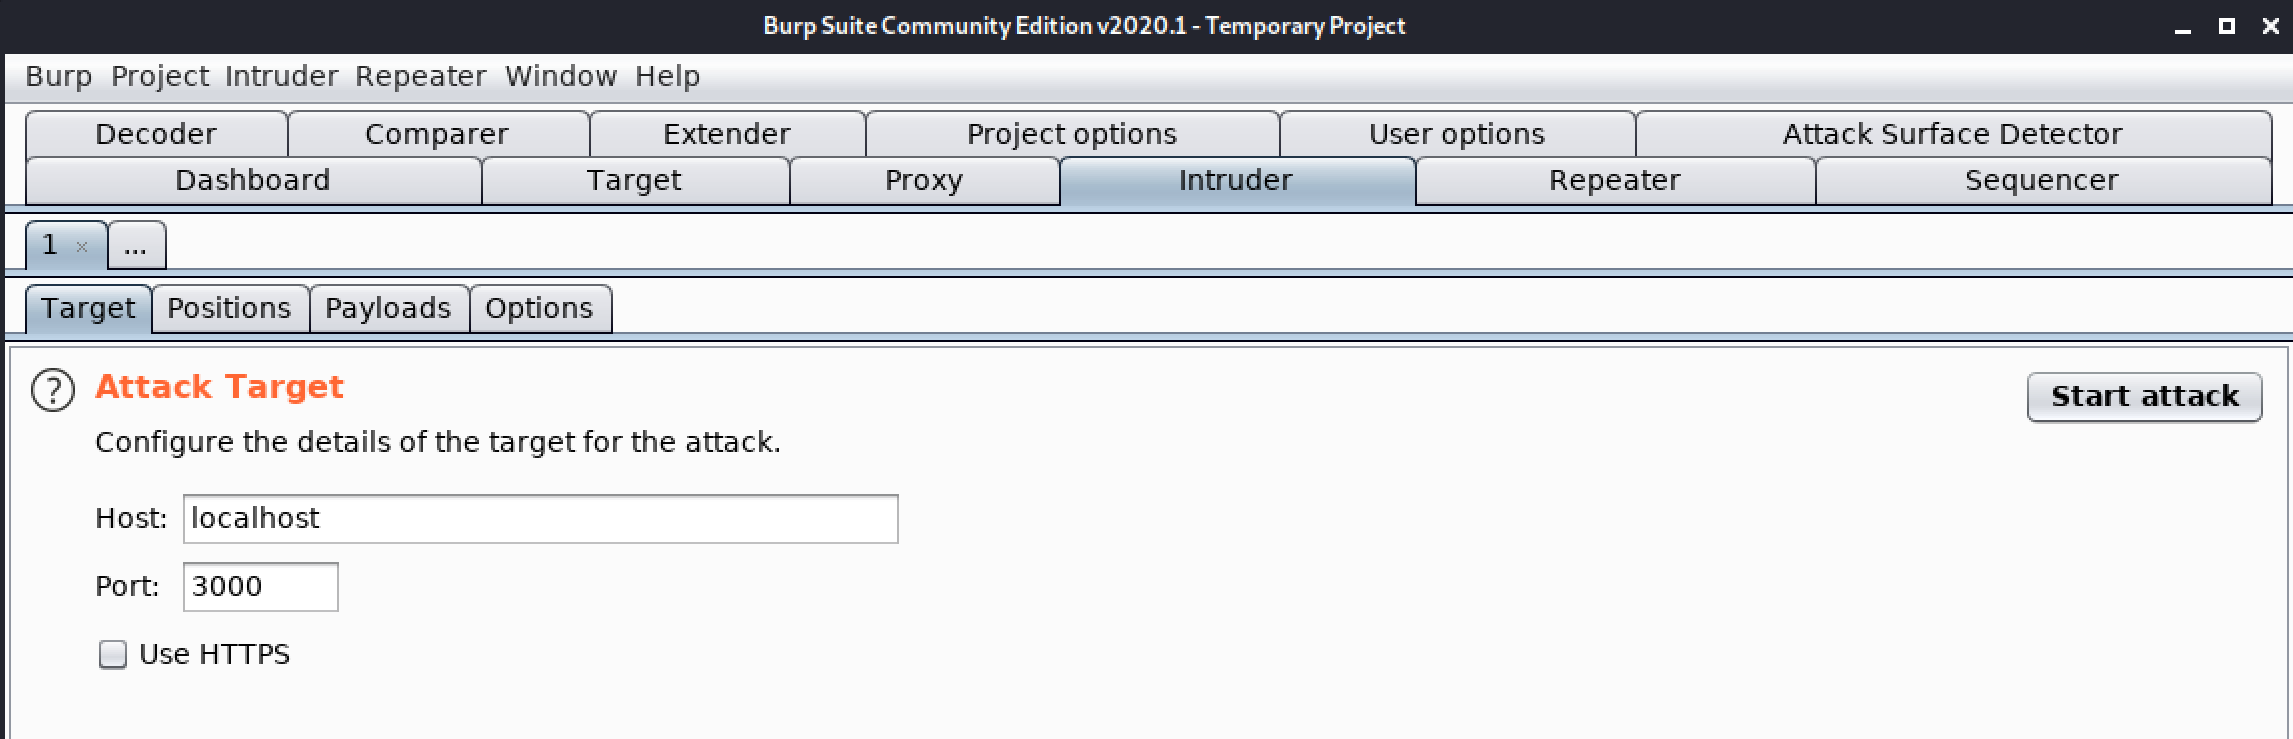
5. In burp, go to the “Intruder” tab, and the “Target” sub-tab. This tab defines your target application. These settings are pre-populated by Burp.
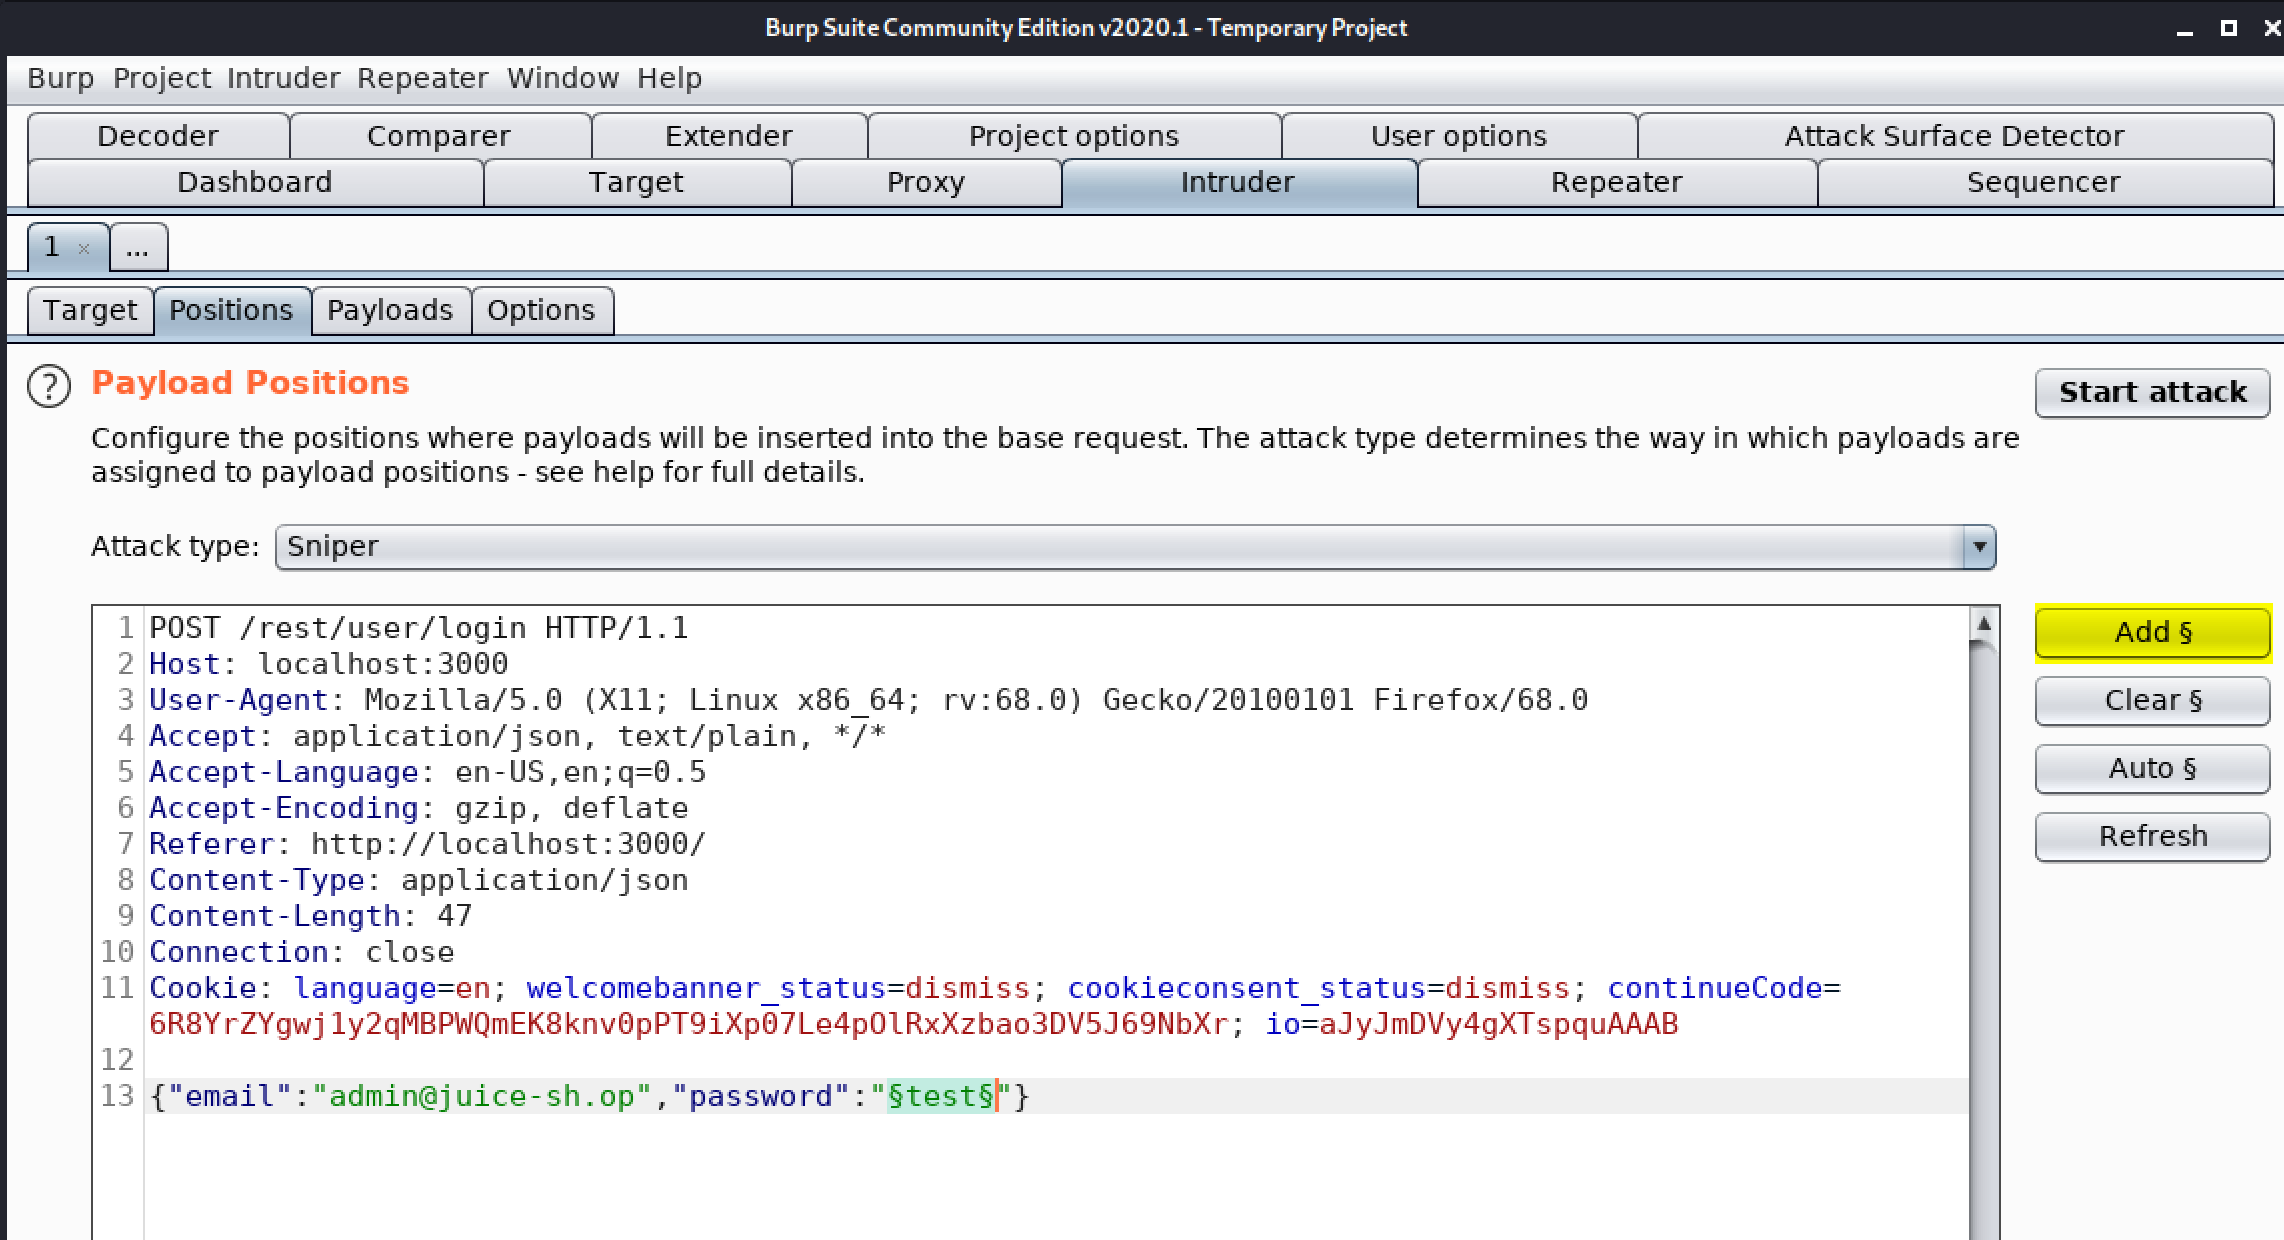
6. Go to the “Positions” tab, click the “Clear §” button from the right-hand side menu. Select the password field by highlighting it with your cursor. Now click the “Add §” button from the right-hand side menu. Now you should have the payload markers wrapping around the password field as shown below.
7. Go to the “Payloads” tab, Payload Sets allows us to set the number of payloads as well as the type. For our purposes, we will use the default settings for Sniper, allowing us to use one payload with a Payload type of Simple list.
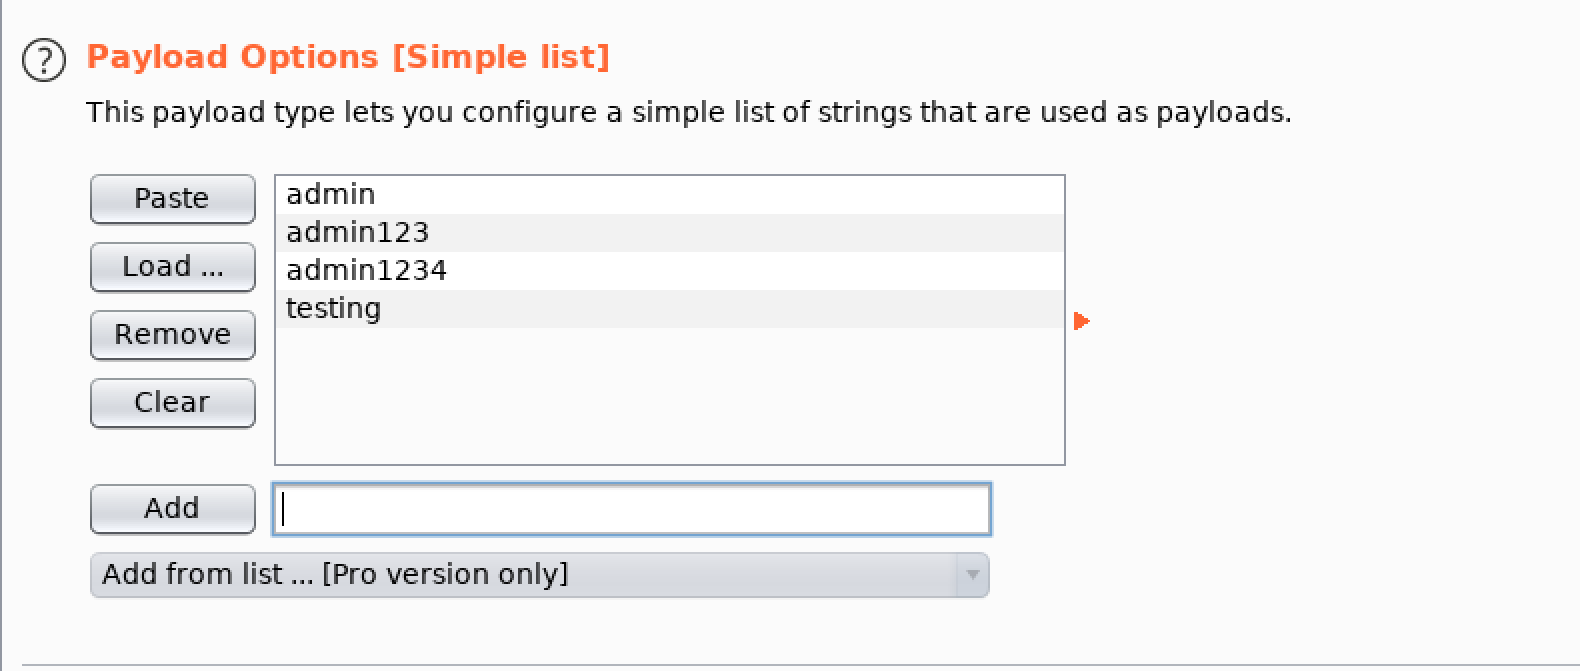
8. In the “Payload Options” section, we can configure a custom payload or load a pre-configured one from a file. For now, we will add some value to our payload. In the text box, type text, and then click the “Add” button to create our custom payload as shown below.
9. Go to the “Options” tab, in the “Request Engine” and enter the number of threads and other details so that it can create less noise on the network while running Intruder.

10. Finally, we are ready to start Intruder. On either the “Target” or the “Payloads” tabs, click the “Start attack” button to start the Intruder.

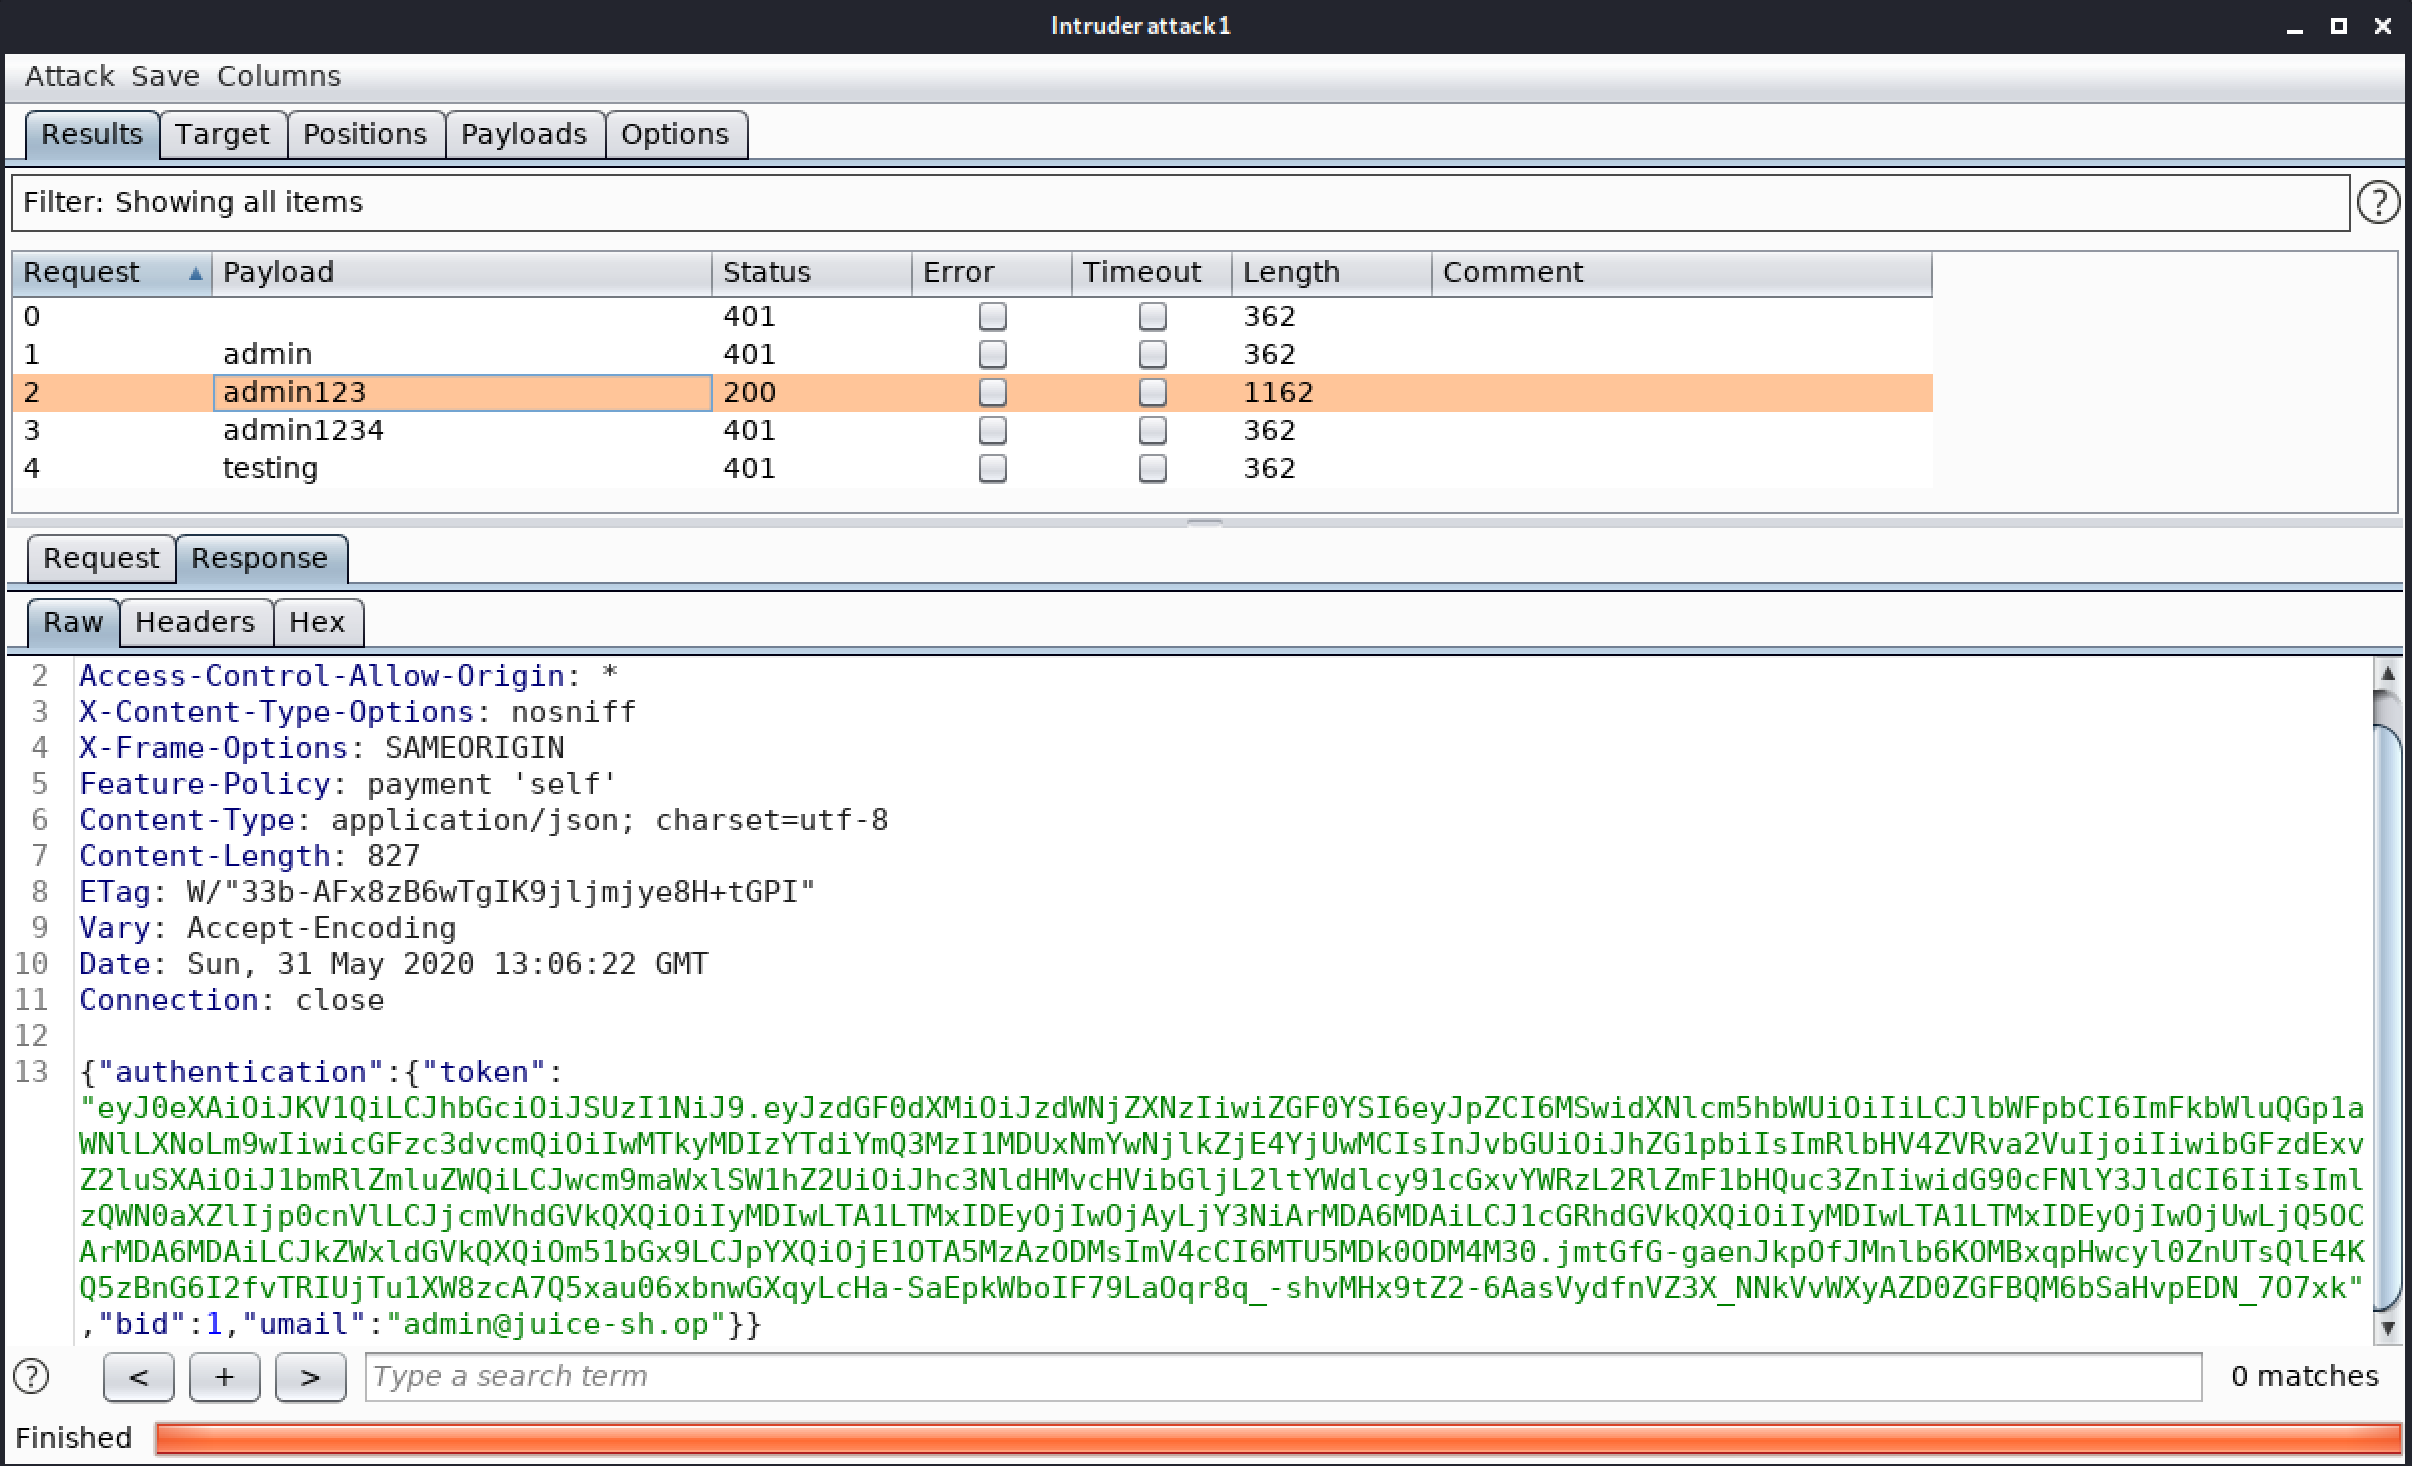
When the attack has started, an attack results table will appear. This allows us to see all payloads send by the intruder. It also allows us to see all requests and responses from this table.
Note that the payload of “admin123” in the password parameter produced a status code of “200”. This means we got an authentication token and we can loge in tot he application with the “admin123” password.
Congratulations! finally, we know how to work with the Burp Intruder tab. In the next Part, we will discuss the Sequencer tab.
#burpsuite #burpsuitetutorial #burp #webapplicaitonpentesting